
Set up in minutes with Autopilot
Let Autopilot design your channels, roles and permissions, then fill in each plugin's settings from a few plain-language answers. Everything is reviewed by you before anything changes.
By the end, you'll have
- A complete server layout (categories, channels, roles and per-role permissions) designed for your community
- Dreamliner's plugins set up to match, with starter messages ready to go
- A backup taken automatically, so you can undo the whole build if you change your mind
Before you start
- Dreamliner in your server with its role near the top. See Add Dreamliner to your server.
- Manage Server on that server.
- About 10 minutes, and a rough idea of what your server is for.
Setting up a server by hand means a lot of decisions: which channels, in which order, who can see what, which roles, which plugins and what they should say. Autopilot asks you about your community in plain language and turns the answers into a real setup. You see exactly what it will do before it does it.
Designs a whole server: channels, categories, roles, permissions, plugins and starter messages.
On setup pages like Welcomer, Tickets and Passport. Describe what you want and it fills in the settings.
Step 1 · about 1 min
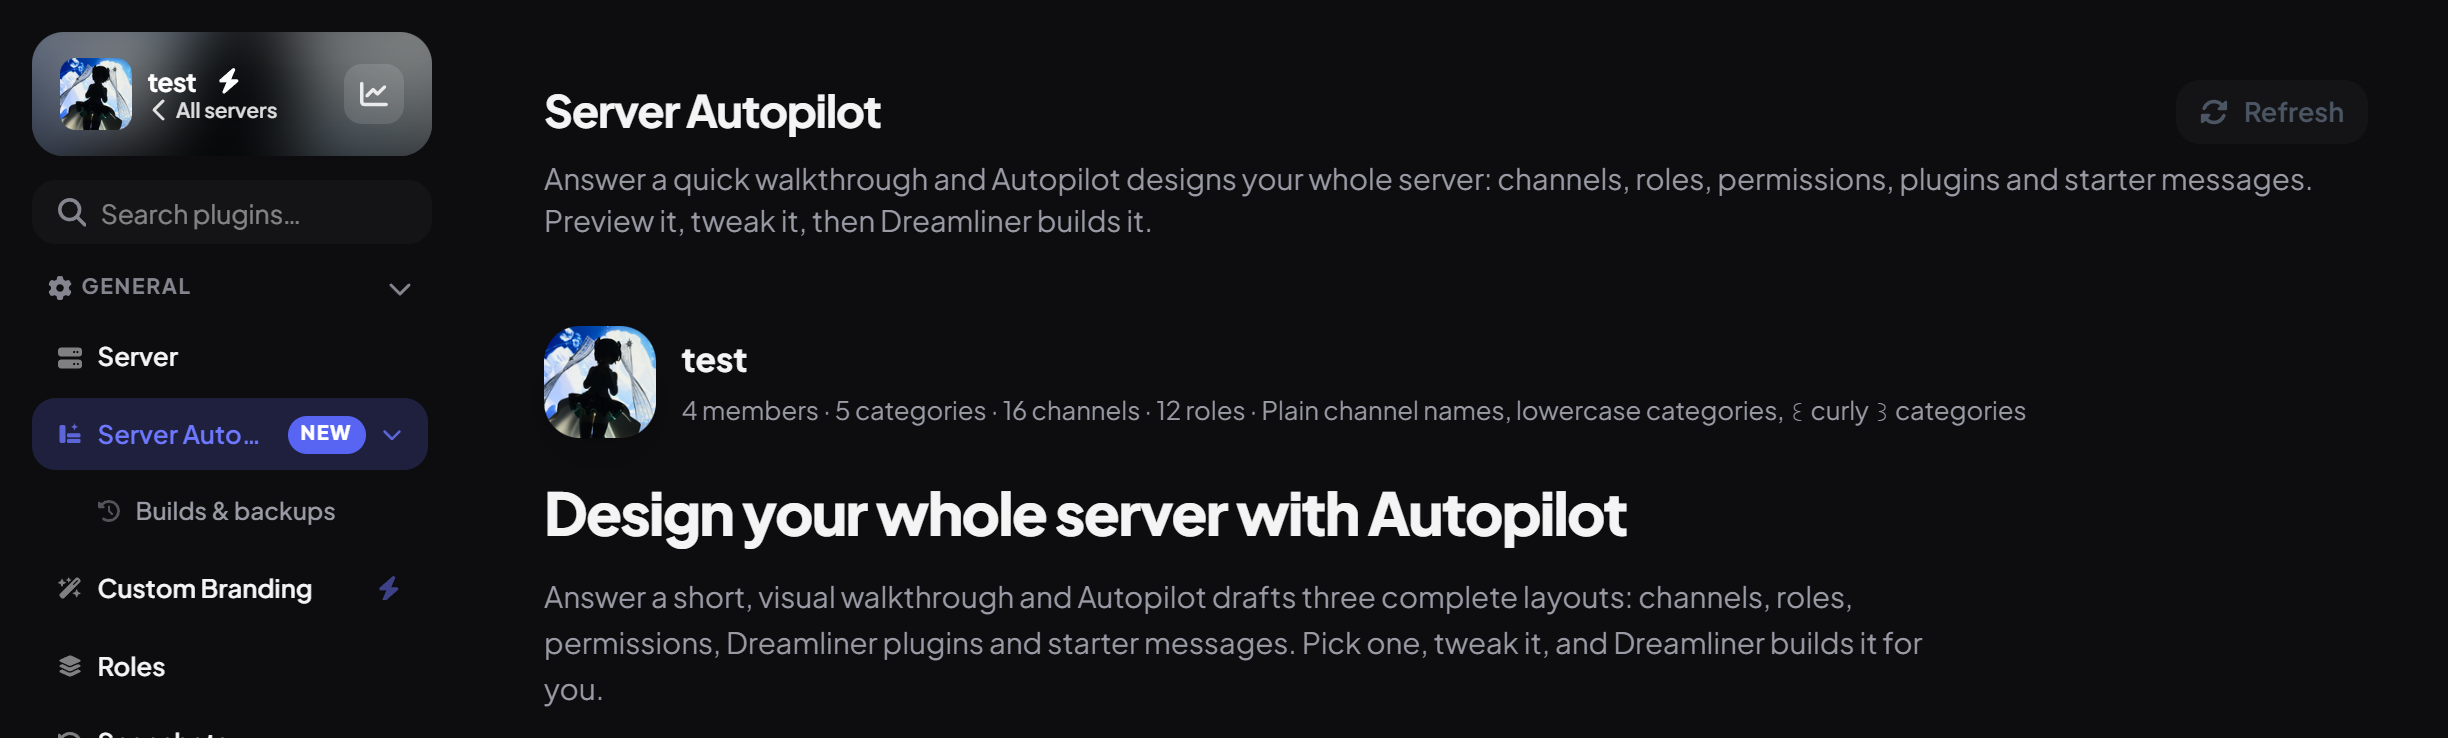
Open Server Autopilot
Start a new design for your server.
- Open your server on the dashboard (or run /config in Discord and open the link).
- In the sidebar, under General, click Server Autopilot.
- Autopilot first scans your server, so it knows what's already there and can reuse it.
Step 2 · about 1 min
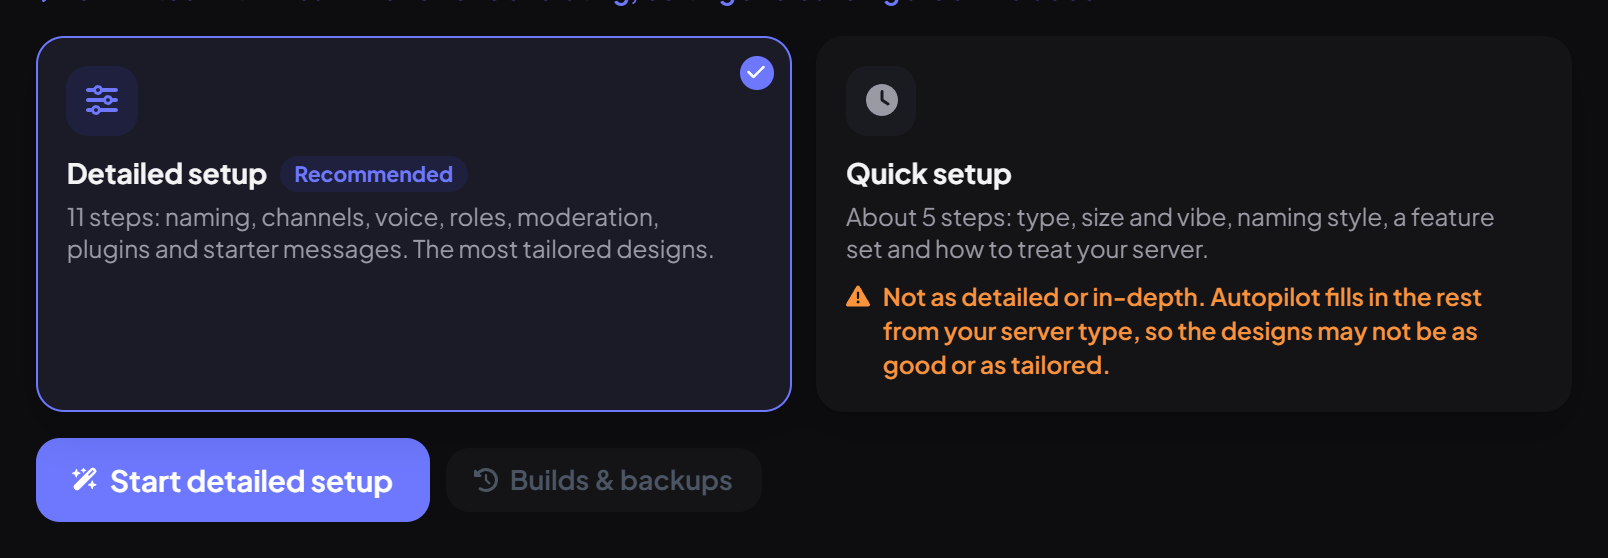
Pick quick or detailed setup
Choose how many questions you want to answer.
Step 3 · about 4 min
Answer the walkthrough
Describe your community so the designs fit it.
Each step shows clear options with pictures, so most answers are a click. A few tips that make a big difference:
| Step | Get the most out of it |
|---|---|
| Server basics | Write one honest line about what the server is for. "A chill server for a small Minecraft SMP" beats a long list of keywords. |
| Naming studio | Pick a style tile, or let Autopilot choose. The preview shows how your channel list will look. |
| Channels & features | Only pick features you'll actually use. Fewer, busier channels feel better than many empty ones. |
| Roles | List your real staff roles. Autopilot gives them sensible permissions and never hands out Administrator. |
| Moderation & verification | Choose how strict to be. Verification adds a Verified role and hides the rest of the server until members pass. |
| Existing server | Choose what to keep. Anything on your keep lists is never touched. |
Step 4 · about 3 min
Pick and polish a design
Choose one of three designs and make it yours.
Press Generate and Autopilot creates three different designs side by side, each with a Discord-style preview of the channel list and roles. This is the one step that uses an Autopilot use. If all three fail, the use is given back.
- Compare the three and pick the one closest to what you want. It doesn't have to be perfect.
- In the customizer, rename, drag to reorder, add or remove channels and roles, and change emoji. All free.
- Fine-tune permissions per role: who can see it, chat, upload files, react and more. On a category, press its lock button; on a channel, expand it to find Permissions.
- Check the starter messages (rules, welcome, role picker) and edit any wording.
Step 5 · about 2 min
Review the plan and build
See every change, pick a build mode, and let Autopilot do the work.
Before anything changes, you get the exact plan: every channel and role that will be created, updated or removed. Then pick how to build:
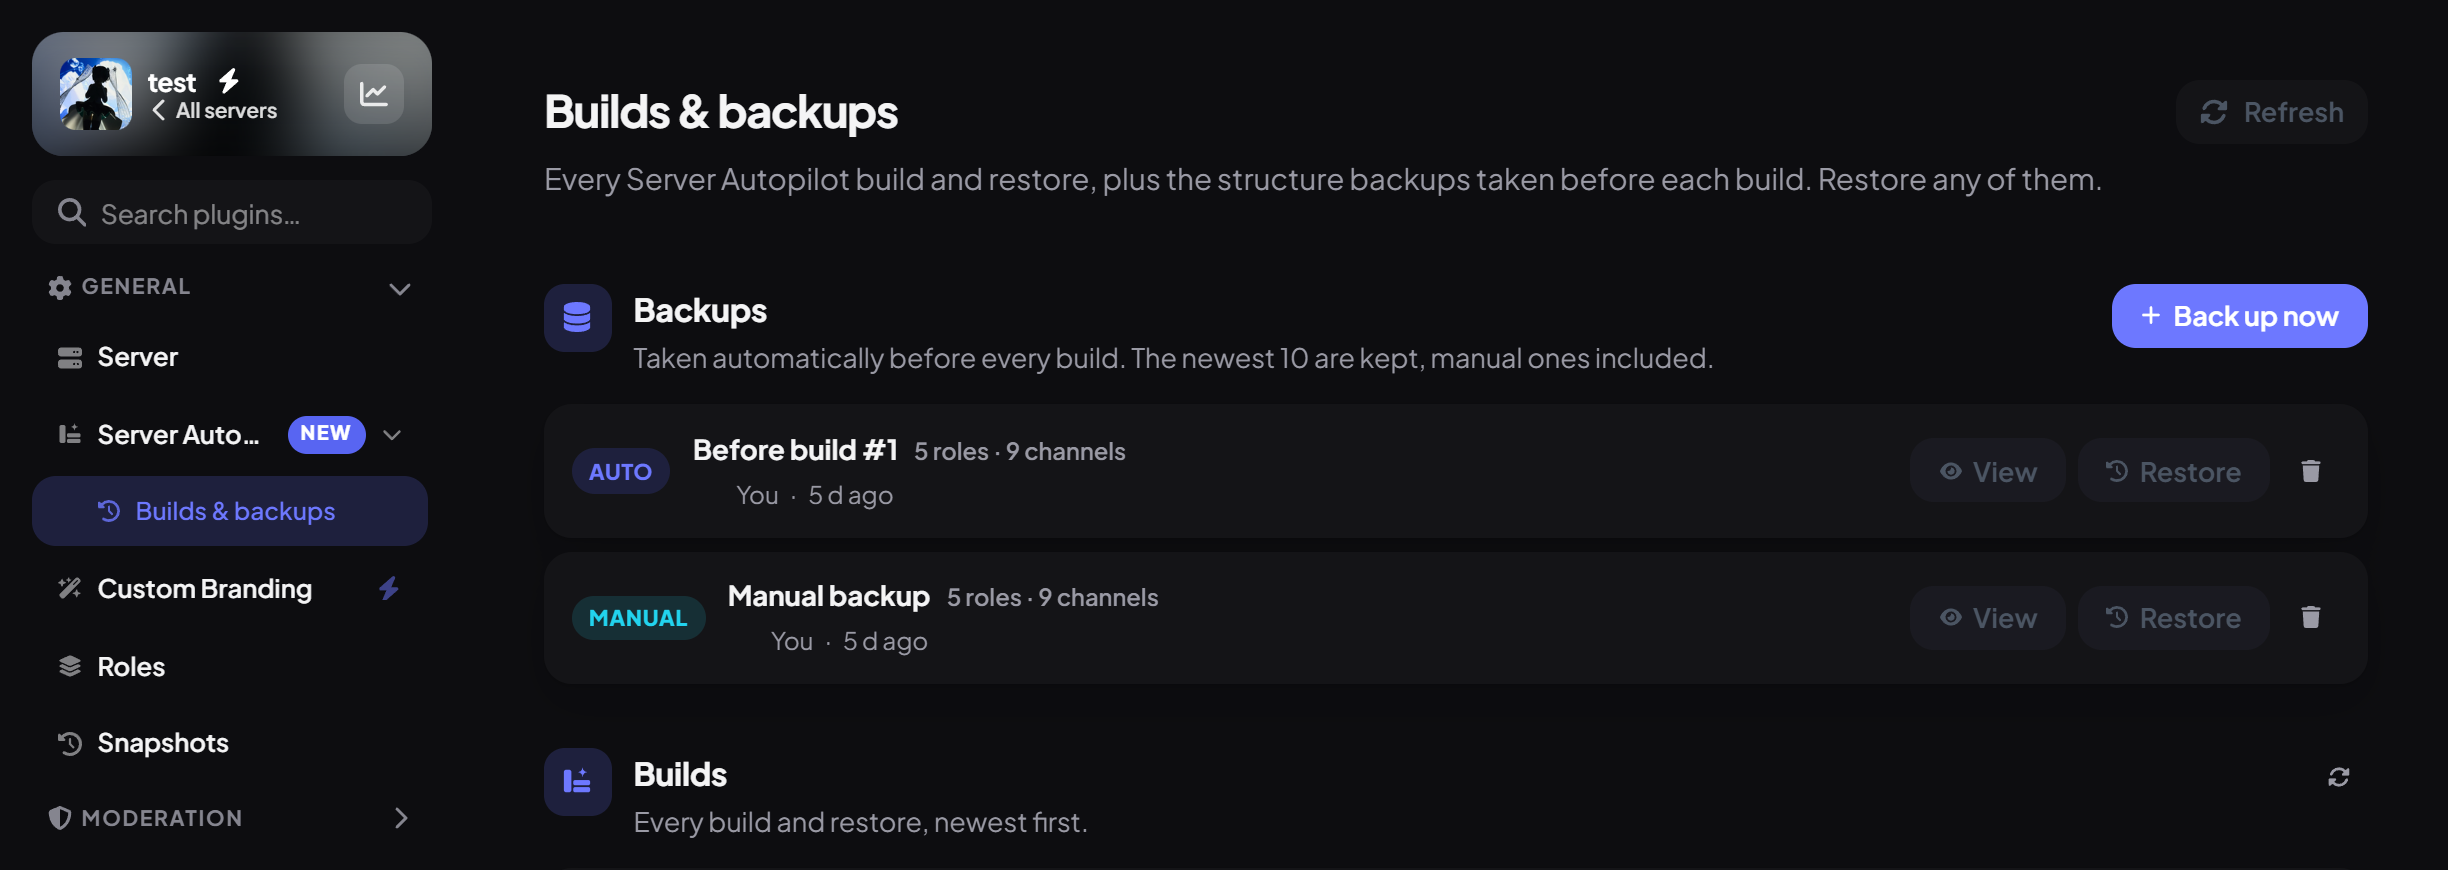
Press Build and watch each part complete live: backup, roles, categories, channels, permissions, order, plugins and messages.
Step 6 · about 2 min
Fine-tune plugins with the Autopilot button
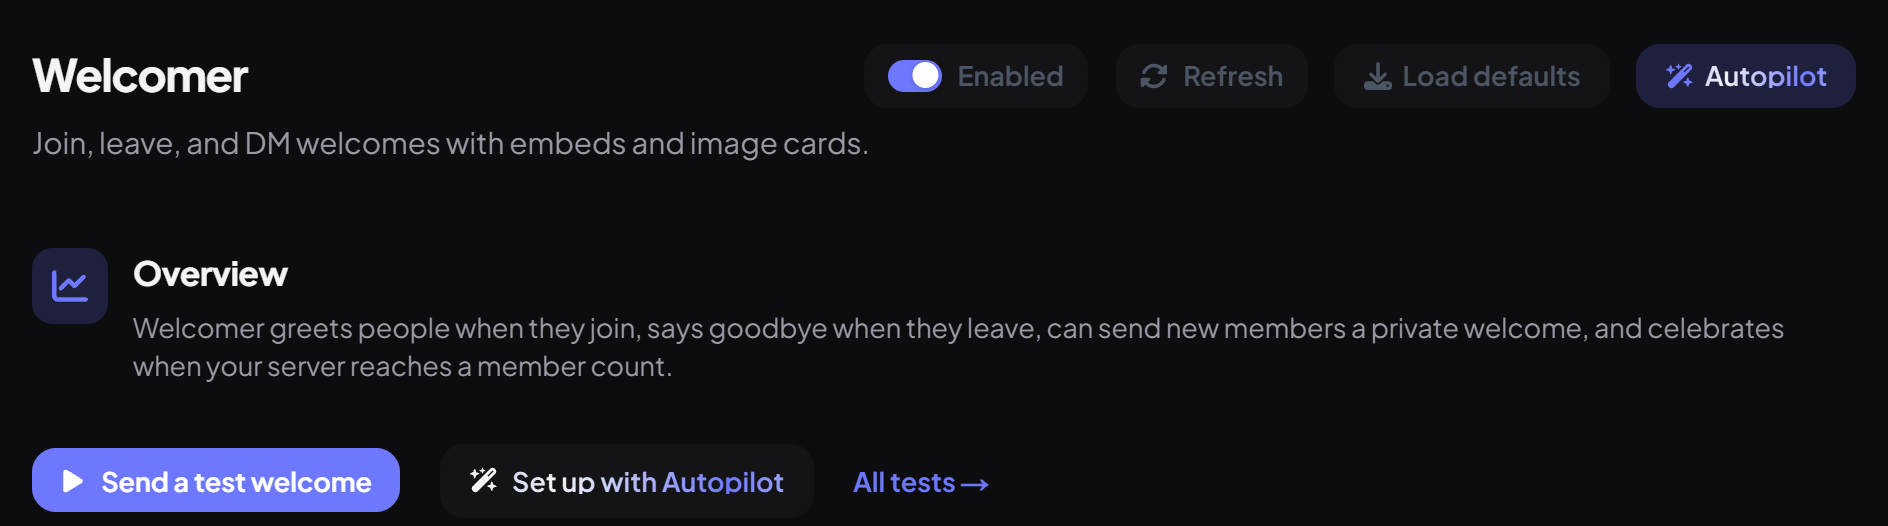
Set up any single plugin by describing what you want.
Server Autopilot sets up the plugins it chose. For anything else, many plugin pages have an Autopilot button at the top, including Welcomer, Tickets, Passport, Starboard, Counting, Counters, Companion Channels, Invite Tracker, Team Control and the if-then rules on the Roles plugin.
- Open the plugin's page and press Autopilot.
- Answer its questions in your own words, like "welcome people in #lobby with a short, friendly message and give them the Member role".
- Autopilot fills in the real settings and drops you back on the page. Check them, then press Save.
Your server is ready
What you just did
- Designed a full server layout with permissions per role, and picked the best of three designs
- Reviewed the exact plan and built it, with a backup taken automatically
- Learned the Autopilot button for setting up any single plugin from plain language
One last thing worth a few minutes: make sure your staff can use the right Dreamliner commands. Autopilot created your staff roles, and the permissions guide shows how to link them to what they can do.
- Set up staff permissions: link your staff roles to Dreamliner Roles.
Common questions
Will Autopilot delete my channels?
Only with Fresh start, which shows every deletion first and asks you to type your server's name. Add never changes what you have, and Merge renames and moves matching channels without deleting messages.
What happens when my free uses run out?
Everything you've already built stays. You can still edit, review and build designs you generated earlier, and set everything up by hand. To keep using Autopilot, Dreamliner One makes it unlimited.
Can I undo a build?
Yes. Every build takes a backup first. Open Server AutopilotBuilds & backups and restore it. You can also restore just the structure or include Dreamliner's settings too.
Who can use Server Autopilot?
Anyone with Manage Server on the server, the same people who can open the dashboard.
Read next